When the air starts to cool and apples fill the markets, my kitchen becomes a warm little haven of cinnamon, butter, and sugar. That’s usually when I pull out my favorite fall recipe: Apple Crisp Cups. They’re everything I love about my dad’s classic apple crisp but baked in tiny, golden portions that make everyone smile. I came up with this version one evening in my sunny Santa Cruz kitchen when I wanted something sweet to share with friends, something that didn’t require plates or forks, just warm, hand-held comfort.

These Apple Crisp Cups are bite-sized bundles of cinnamon-spiced apples topped with a buttery oat crumble. They’re perfectly balanced, crisp edges, tender centers, and just the right amount of sweetness. If you’ve ever made my Applesauce Cake or Caramel Apple Cheesecake Bars, you’ll recognize that same cozy, homemade feeling in every bite.
The Story and Why You’ll Love These Apple Crisp Cups
I’ve always believed that the best desserts are the ones that feel familiar. Growing up, we didn’t have fancy ingredients, just whatever fruit was in season and plenty of creativity. My dad could turn leftover apples into something magical, and these Apple Crisp Cups are my version of that magic. They’re quick, forgiving, and full of flavor, just like the dishes we used to make together.
McIntosh apples are my favorite here because they soften beautifully and create that warm, saucy filling that makes the house smell incredible. If you’ve tried my Best Apple Cake, you already know how well they bake. A touch of cinnamon and brown sugar brings everything together, and you don’t need any special tools, just a bowl, a spoon, and a muffin tin.
What Makes This Recipe Special
These Apple Crisp Cups are made from simple pantry ingredients, flour, oats, brown sugar, butter, and a hint of nutmeg. The crust doubles as the topping, giving you that perfect balance of chewy and crisp. They bake in about 20 minutes, which means you can whip them up on a weeknight or just before guests arrive.
They’re also surprisingly versatile. Serve them warm with a scoop of vanilla ice cream for dessert, or enjoy one cold the next morning with coffee. You can even crumble one over yogurt for a quick breakfast, trust me, I’ve done it. If you like make-ahead treats such as my Pumpkin Dump Cake or Blueberry Cobbler, these cups will fit right in your rotation. They’re easy to freeze and just as good reheated.
Step-by-Step Instructions and Pro Tips for Perfect Apple Crisp Cups
Now that you know the story behind these cozy little treats, let’s get into how to make them. The beauty of Apple Crisp Cups lies in their simplicity, everyday ingredients, easy prep, and quick baking time. With a few smart steps, you can turn chopped apples and oats into a bakery-worthy dessert that makes your whole kitchen smell like fall.
Print
Apple Crisp Cups: 5 Simple Steps to Amazing Dessert
- Total Time: 1 hr 5 mins
- Yield: 48 mini cups
- Diet: Vegetarian
Description
- Mini apple crisps baked in muffin tins for a cozy, hand-held dessert. Soft cinnamon apples meet buttery oat crumble, easy, quick, and perfect for fall gatherings.
Ingredients
- 3 large McIntosh apples – peeled, cored, and chopped
- ¼ cup water
- 2 tablespoons white sugar
- 1 ½ teaspoons ground cinnamon, divided
- 2 cups all-purpose flour
- 2 cups rolled oats
- 1 ½ cups brown sugar
- ½ teaspoon ground nutmeg (optional)
- 1 ½ cups butter
Instructions
- Preheat the oven to 350°F (175°C). Grease four 12-cup mini-muffin tins.
- Mix apples, water, white sugar, and ½ teaspoon cinnamon in a saucepan. Simmer over medium-low heat for 5 minutes until apples soften. Remove from heat.
- Combine flour, oats, brown sugar, remaining cinnamon, and nutmeg in a large bowl. Cut in butter until mixture forms coarse crumbs.
- Press 1 heaping tablespoon of crust mixture into each muffin cup, covering bottom and sides.
- Add 2 teaspoons of apple filling to each cup, then sprinkle 1 teaspoon of crumble on top.
- Bake 15–20 minutes, until golden brown. Let cool 10 minutes before removing from tin.
Notes
- Use McIntosh apples for a soft, saucy filling or Honeycrisp for firmer texture.
- Let the cups cool completely before storing to prevent sogginess.
- Best served warm with vanilla ice cream or a drizzle of caramel sauce.
- Prep Time: 45 mins
- Cook Time: 20 mins
- Category: Dessert
- Method: Baking
- Cuisine: American
Table of Contents
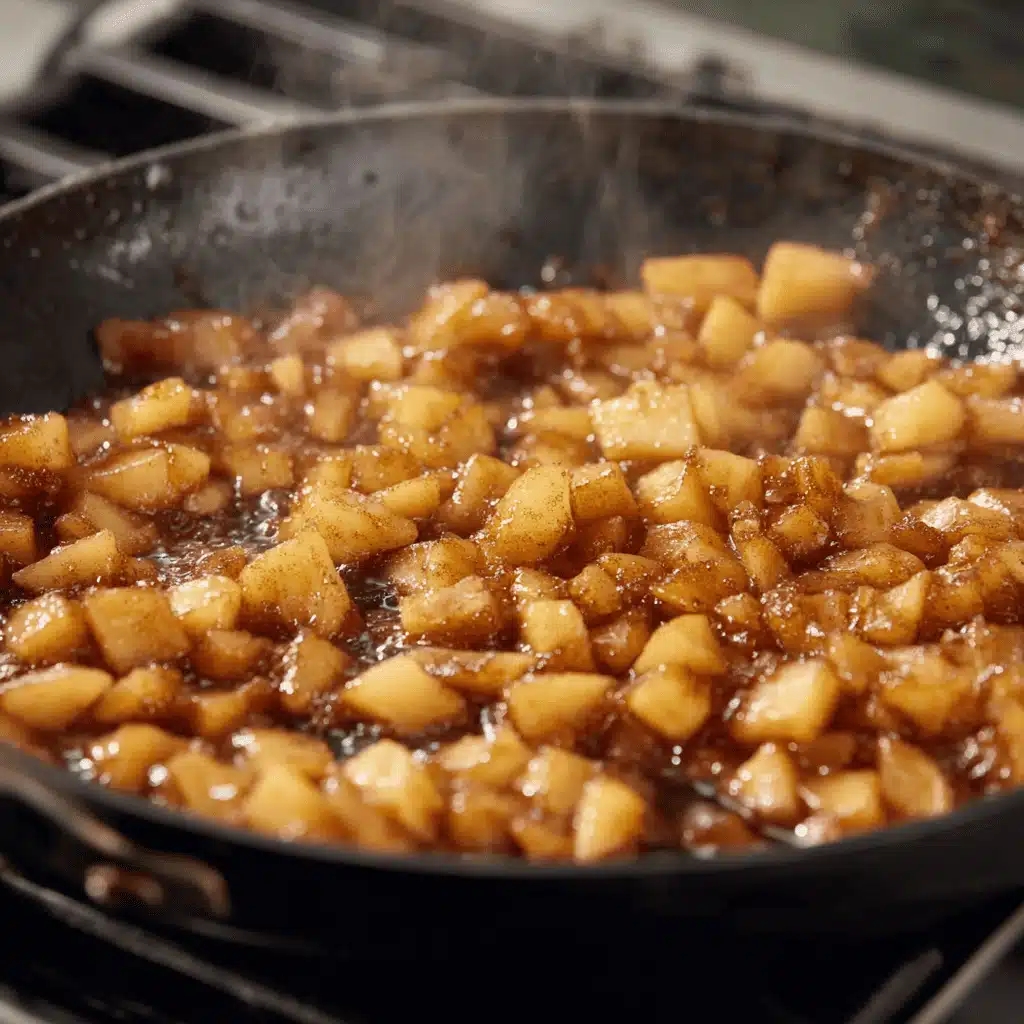
Preparing the Apple Filling
Start with three large McIntosh apples, they’re the secret to that soft, saucy texture. Peel, core, and chop them into small pieces so they fit neatly into the muffin cups. Combine the apples with a little water, white sugar, and half a teaspoon of cinnamon in a saucepan. Simmer them gently for about five minutes, just until the apples begin to soften and release their juices. This short cooking time keeps the filling bright and fresh, not mushy.
Once they’re ready, take them off the heat and set them aside. The mixture will thicken slightly as it cools, making it easy to spoon into the crust later. If you love that apple-cinnamon aroma, you might also enjoy the scent of my Blueberry Cobbler or Pumpkin Dump Cake, both bring the same warm, cozy feeling to your kitchen.
Making the Buttery Oat Crust
In a large bowl, combine flour, rolled oats, brown sugar, the remaining cinnamon, and a pinch of nutmeg. Then cut in the butter using a pastry cutter or your fingertips until the mixture looks crumbly. This is the base and the topping, one simple mix that does double duty.
To assemble, press about a tablespoon of the crust mixture into each greased muffin cup. You’ll want to form a little “nest” that covers the bottom and sides. Don’t stress about getting it perfect; rustic is the aim. Spoon about two teaspoons of the apple filling into each cup, then sprinkle a teaspoon of the remaining crumb mixture on top.
Bake in a preheated 350°F oven for 15 to 20 minutes, or until golden and bubbling. Let them cool in the tin for about 10 minutes before carefully lifting them out. They’ll firm up as they cool, giving you that crisp edge with a soft, gooey center.
My Favorite Tips for Success
- Choose the right apples. McIntosh are classic, but Honeycrisp, Gala, or Granny Smith work beautifully too. Each brings its own twist, from tart to extra-sweet.
- Cut the butter cold. Cold butter gives you that signature crumble texture that melts perfectly in the oven.
- Don’t skip the rest time. A quick cool in the tin helps the crust hold its shape, so the cups don’t fall apart.
- Bake in batches. With 48 cups, use multiple trays or bake half at a time. The second batch will bake even better as your oven stays evenly heated.
Serving Ideas
These Apple Crisp Cups are best served warm with a scoop of vanilla ice cream, a drizzle of caramel sauce, or even a dollop of whipped cream. If you’re planning a fall dessert spread, try pairing them with my Chewy Chocolate Chip Oatmeal Cookies or White Chocolate Raspberry Cheesecake for a delicious variety of textures and flavors.
If you’d like to serve them at a gathering, bake them a few hours ahead, then warm them in a low oven just before guests arrive. They make a great handheld dessert for parties or school events, no fork required.
Make-Ahead, Storage & Freshness Tips for Apple Crisp Cups
One of the best things about Apple Crisp Cups, aside from how good they taste, is how well they hold up. You can bake them ahead, store them easily, and reheat them without losing that signature crunch. Whether you’re preparing for a holiday dinner, a bake sale, or just planning dessert for the week, these little cups fit beautifully into your schedule.
How to Make Apple Crisp Cups Ahead of Time
If you love to plan ahead, you’re in luck. These mini desserts are made for it. You can prepare both the filling and the crumble mixture up to two days in advance. Just store each component in an airtight container in the refrigerator until you’re ready to bake.
When you’re ready, assemble the cups and bake them fresh. The house will smell like warm apples and cinnamon in minutes. This make-ahead trick is perfect if you’re juggling multiple dishes, just like when I prep my Applesauce Cake or Red Velvet Cupcakes a day before guests come over.
You can also bake the cups completely, let them cool, and freeze them for up to a month. To reheat, place them in a 300°F oven for about 10 minutes, and they’ll come out warm and slightly crisp again.
Keeping Apple Crisp Cups from Getting Soggy
No one likes a soggy dessert, and the secret to avoiding that is proper storage. After baking, let your Apple Crisp Cups cool completely on a wire rack. This keeps steam from collecting at the bottom, which can soften the crust. Once cooled, store them in a single layer in an airtight container lined with parchment paper.
If you stack them, add a sheet of parchment between layers. Stored at room temperature, they’ll stay fresh for about two days. For longer storage, refrigerate them for up to five days or freeze them. The texture stays surprisingly crisp, especially if you give them a quick warm-up in the oven before serving.
Pro tip: Avoid microwaving. It can make the oats chewy instead of crisp. An oven or toaster oven keeps that buttery crumble just right.
Freshness Tips and Reheating
To bring your Apple Crisp Cups back to life after freezing or refrigerating, place them on a baking sheet and warm them in a 325°F oven for 8 to 10 minutes. This revives the crispness without drying them out. If you want to take them to the next level, add a drizzle of caramel sauce or a small scoop of vanilla ice cream right before serving.
I’ve even served leftover cups crumbled over ice cream sundaes or layered into a parfait with whipped cream. The result tastes like a mix of crisp and pie, one of those desserts that feels much fancier than it is. If you love creative ways to reuse leftovers, you might also like how I repurpose extras from my Best Apple Cake into breakfast treats.
When to Refrigerate Apple Crisp Cups
If you’re keeping your apple crisp cups for more than a couple of days, refrigeration is a smart move. They’ll stay fresh and safe to eat for about five days. Just be sure they’re completely cooled before sealing them in a container, trapping steam can make the crust soft.
When it’s time to serve, let them come to room temperature or pop them in the oven for a quick reheat. You’ll be surprised how the flavors deepen after a day or two, the cinnamon and brown sugar become richer, and the apples taste even sweeter.
Serving Suggestions
Apple Crisp Cups are lovely on their own, but they also make an amazing base for simple pairings:
- Serve warm with a scoop of vanilla or cinnamon ice cream.
- Add a drizzle of caramel sauce or a spoonful of whipped cream.
- Crumble one over yogurt or oatmeal for a cozy breakfast twist.
- For a party platter, serve alongside my Chewy Chocolate Chip Oatmeal Cookies or White Chocolate Raspberry Cheesecake for a mix of flavors and textures.
These mini crisps also make great gifts, wrap a few in parchment and tie with string for a rustic, homemade touch.

Conclusion
Making Apple Crisp Cups is about capturing the comfort of a classic apple crisp in an easy, shareable way. You don’t need fancy equipment or complicated steps, just good apples, a bit of butter, and a warm oven. Each bite brings that perfect mix of soft, spiced fruit and crisp, buttery topping that never gets old.
From cozy family dinners to quick weekday desserts, these cups fit every occasion. They’re proof that home cooking doesn’t have to be fussy to be special, just like the recipes that inspired Easy Recipes April in the first place.
For more easy, feel-good recipes, browse www.easyrecipesapril.com.
Fore more recipes follow me on Facebook, Pinterest and Instagram
Frequently Asked Questions About Apple Crisp Cups
What apples work best for apple crisp cups?
McIntosh apples are the classic choice because they soften into that perfect saucy filling. For a firmer texture, Honeycrisp or Pink Lady hold their shape beautifully. Granny Smith adds a nice tart contrast, and mixing varieties gives you the best flavor balance.
How do you keep apple crisp cups from getting soggy?
Let them cool completely before storing to prevent steam from softening the crust. Keep them in a single layer in an airtight container, and reheat in the oven for about 10 minutes to restore their crisp texture. Avoid the microwave, which can make the oats chewy.
Can you make apple crisp cups ahead of time?
Yes, you can prepare the filling and crumble a day ahead, or bake the cups completely and freeze them for up to a month. Reheat in the oven before serving, and they’ll taste just as fresh as the day they were made.
Do apple crisp cups need to be refrigerated?
If you’ll enjoy them within two days, they’re fine at room temperature. For longer storage, refrigerate in an airtight container for up to five days. Reheat gently in the oven before serving to bring back their warm, buttery flavor.