When I think about chocolate covered strawberries, I’m taken back to my sunny Santa Cruz kitchen, the same spot where my dad used to melt leftover chocolate bars and dip strawberries from our backyard garden. We’d line them up on wax paper, trying not to eat them before the chocolate set. It wasn’t fancy, but it was pure happiness. That little ritual taught me that simple desserts can be the most memorable ones.

Today, I still make chocolate covered strawberries the same way, fast, fuss-free, and full of joy. You don’t need a culinary degree or expensive tools, just good chocolate, fresh berries, and a bit of care. The trick is using the right chocolate and letting the strawberries dry completely before dipping; that’s how you get that perfect glossy finish.
What I love most about this recipe is how effortlessly it fits any occasion. A few on a plate beside my easy chocolate cake recipe make a dessert table look elegant without the stress. Or try serving them alongside white chocolate macadamia nut cookies for a beautiful mix of textures. They even make charming gifts, wrap a few in parchment paper, tie them with twine, and they’re ready to share.
This recipe proves you don’t need hours in the kitchen to make something stunning. Over the next sections, we’ll uncover the simple secrets that make your chocolate covered strawberries look like they came from a boutique chocolatier, while keeping that warm, homemade touch that makes them unforgettable.
Print
Chocolate Covered Strawberries: Easy, Foolproof, and Delicious
- Total Time: 20 mins
- Yield: 24 strawberries
- Diet: Vegetarian
Description
- Classic homemade chocolate covered strawberries made in 20 minutes, simple, glossy, and delicious.
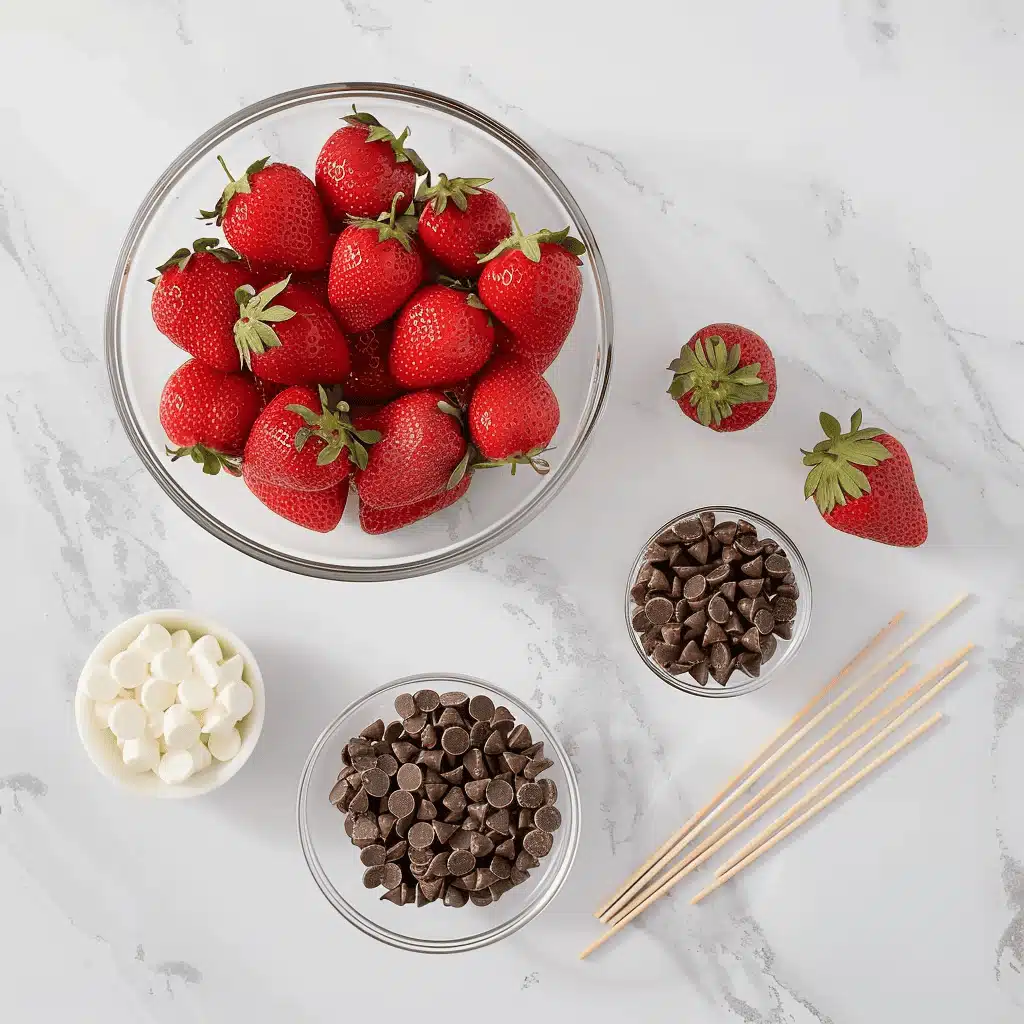
Ingredients
- 16 ounces milk chocolate chips
- 2 tablespoons shortening
- toothpicks (for dipping)
- 1 pound fresh strawberries with leaves
Instructions
- Gather all ingredients.
- Melt chocolate and shortening in a double boiler, stirring occasionally until smooth.
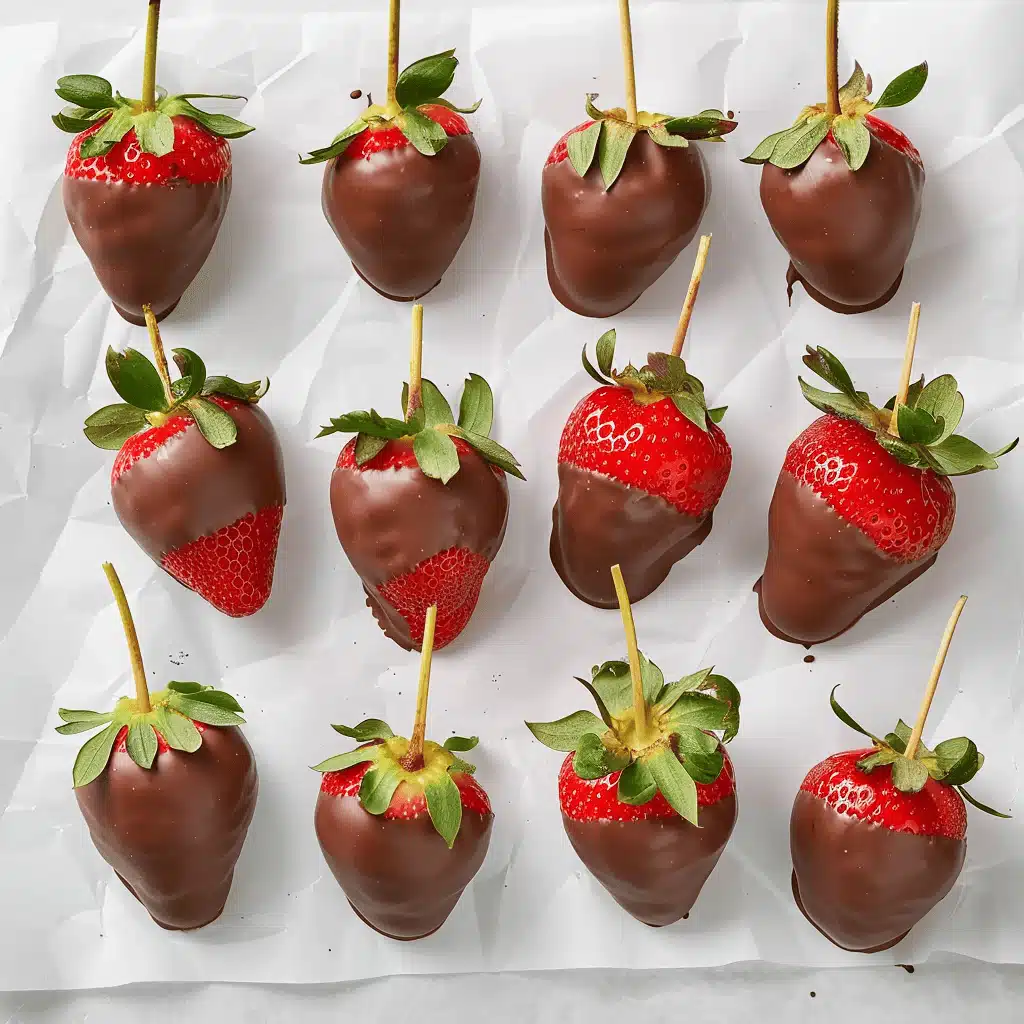
- Insert toothpicks into tops (stem ends) of strawberries. Hold a strawberry by the toothpick and dip it into the chocolate mixture.
- Turn the strawberry upside down and insert the toothpick into a Styrofoam block or place strawberry on a sheet of waxed paper; allow chocolate coating to cool. Repeat with remaining strawberries.
Notes
- Dry strawberries completely before dipping.
- Use room temperature fruit for best results.
- Enjoy within 24 hours for the freshest taste.
- Prep Time: 15 mins
- Cook Time: 5 mins
- Category: Dessert
- Method: No-Bake
- Cuisine: American
Secrets Behind Perfect Chocolate Covered Strawberries
If you’ve ever wondered why some chocolate covered strawberries look flawlessly smooth while others end up dull or streaky, the difference comes down to a few easy tricks. Once you know them, you’ll never have to buy store-bought again.
Table of Contents
The Secret to the Glossy Chocolate Finish
The glossy, mirror-like finish everyone loves starts with the melting method. Always melt your chocolate slowly and evenly. I prefer a double boiler, where the steam gently warms the chocolate without burning it. If you’re short on time, the microwave works fine, just heat it in 20-second bursts and stir in between. A teaspoon of shortening or coconut oil makes the chocolate more fluid and gives it that smooth, shiny coating once it sets.
Another secret? Don’t rush the cooling process. Set your dipped strawberries on parchment paper at room temperature. Refrigeration can cause condensation, making the coating dull and patchy. When done right, your chocolate should set with a soft shine and a satisfying snap.
You can take it a step further with toppings. Try drizzling with white chocolate like I do in my chocolate caramel brownies, or sprinkle crushed nuts for a texture similar to my chewy chocolate chip oatmeal cookies.
Choosing the Best Chocolate for Dipping
When it comes to flavor, the kind of chocolate you use makes all the difference. For classic sweetness, milk chocolate chips melt beautifully. If you prefer a richer, more intense bite, go for dark chocolate, it pairs perfectly with the natural tartness of strawberries. White chocolate, while sweeter, can add a lovely contrast if you drizzle it decoratively.
Quality matters more than anything. I’ve had great results using the same chocolate I melt for my black forest cake and easy moist chocolate cupcakes. Skip candy melts or overly processed brands, they don’t have the same flavor depth or texture.
The goal is balance: a glossy shell that cracks cleanly but melts luxuriously in your mouth. In the next section, we’ll go over how to make that chocolate stick perfectly to each berry so not a drop goes to waste.
How to Make Chocolate Stick to Strawberries Every Time
When it comes to making chocolate covered strawberries, the real magic happens before you even melt the chocolate. Getting that glossy coating to cling perfectly to each berry starts with proper prep and a little patience.
Prepping Strawberries the Right Way
The number one rule? Your strawberries must be completely dry. Even a drop of water can ruin the chocolate’s texture, causing it to seize or slide right off. After rinsing the berries gently under cool water, lay them out on a paper towel and let them air-dry for at least 30 minutes. I usually pat them again right before dipping to be sure.
Choose firm, ripe strawberries with their green tops intact, it gives you a natural handle for dipping and adds a beautiful contrast once coated. If you’ve ever made my apple crisp cups, you’ll know how a bit of care in prep makes all the difference in presentation.
If you’re planning ahead for a party or date night, you can prep your berries earlier in the day, just keep them at room temperature. Cold strawberries make chocolate harden unevenly and can cause condensation once they’re dipped.
Melting and Dipping Like a Pro
Once your chocolate is melted and smooth, hold each strawberry by the stem or use a toothpick. Dip it into the chocolate, gently twisting so the coating wraps evenly. Let the excess drip off, then place it on parchment paper. For a little creative flair, drizzle with leftover chocolate or add a sprinkle of crushed cookies like I do in my brookies brownie cookies.
If you’re after extra crunch, try rolling them in chopped nuts, coconut, or mini chocolate chips right before the coating hardens. That same layering trick makes my cranberry bars stand out, it adds texture without losing that rich, silky finish.
The key to success is timing. Dip, set, and leave them undisturbed until the chocolate firms up naturally. You’ll end up with berries that look bakery-perfect and taste even better.
Storing and Serving Chocolate Covered Strawberries
You’ve mastered the melting, dipping, and glossy finish, but keeping your chocolate covered strawberries beautiful after they’re made is just as important. Storage and presentation can make or break this dessert, especially if you’re gifting them or saving a few for later.
Why You Should Avoid the Fridge
It might feel natural to chill them, but refrigeration is one of the biggest mistakes people make with chocolate covered strawberries. The cold air creates condensation when you bring them back to room temperature, which dulls the chocolate and sometimes causes it to separate from the berry. Instead, let them set naturally at room temperature on parchment or wax paper.
If you absolutely must store them overnight, place them in a single layer inside an airtight container lined with parchment. Crack the lid slightly to prevent moisture from building up. They’ll stay fresh and glossy for up to 24 hours. For longer storage, it’s better to make a new batch, they’re quick enough that freshness always wins.
I follow the same logic when I make my easy batter fruit cobbler or blueberry cobbler: fresh fruit desserts just taste better the same day they’re made.
Simple Tricks for Stunning Presentation
Presentation is where you can really make your chocolate covered strawberries shine. Once the chocolate has set, arrange them on a serving platter lined with parchment or place them in mini cupcake wrappers for an elegant touch. A drizzle of white chocolate or a dusting of crushed freeze-dried berries adds a pop of color.
If you’re serving at a gathering, keep them at a cool room temperature and out of direct sunlight. I like pairing them with slices of lemon blueberry cake or a chilled piece of no-bake cheesecake. The combination of creamy, tart, and fruity flavors feels indulgent but balanced.
These small details turn a simple recipe into a dessert that looks, and tastes like it came from a patisserie. Just remember: fresh berries, smooth chocolate, and the right temperature make perfection possible.
Conclusion
There’s a reason chocolate covered strawberries never go out of style, they’re simple, stunning, and irresistibly delicious. From the satisfying snap of chocolate to the burst of juicy sweetness inside, each bite feels like a celebration. With just a few ingredients and 20 minutes, you can create a dessert that looks as elegant as it tastes.
If you enjoyed this recipe, try pairing it with my easy lemon cookies for a light finish or surprise guests with a tray of no-bake peanut butter chocolate cookies. They’re all easy, crowd-pleasing, and perfect for sharing.
So grab your chocolate, wash those berries, and dip away, because homemade treats don’t need to be complicated to feel special.
Fore more recipes follow me on Facebook, Pinterest and Instagram
FAQs About Chocolate Covered Strawberries
What is the secret to chocolate covered strawberries?
The secret to perfect chocolate covered strawberries lies in two things: dry berries and properly melted chocolate. Any moisture on the fruit prevents the coating from sticking, so make sure your strawberries are completely dry. Gently melt the chocolate using a double boiler or microwave it in short bursts so it doesn’t burn.
What’s the best chocolate to use when dipping strawberries?
Use high-quality chocolate, either milk, dark, or white depending on your preference. Milk chocolate gives a classic creamy sweetness, dark chocolate offers rich depth, and white chocolate makes for elegant drizzles or two-tone designs. Skip candy melts, as they lack the flavor and shine of real chocolate.
How do I get chocolate to stick to my strawberries?
The chocolate won’t stick if your berries are cold or wet. Always let them come to room temperature and dry them thoroughly. When dipping, hold each berry by the stem and rotate it slowly in the melted chocolate for full coverage. Set it on parchment paper and let it cool naturally.
Why can’t you put chocolate covered strawberries in the fridge?
Refrigerating them causes condensation, which dulls the chocolate and softens the berries. Instead, let them rest at room temperature until the coating hardens. If you need to store them briefly, keep them in a single layer on parchment in a cool spot away from sunlight. Remember, chocolate covered strawberries are best enjoyed fresh, the texture and shine are unbeatable right after dipping.