There’s something irresistible about Mini Cherry Cheesecakes, creamy, sweet, and just the right size for one perfect bite. I still remember the first time I made them in my sunny little Santa Cruz kitchen. It was one of those slow Sunday afternoons when I decided to make dessert with whatever I had on hand. I crushed a few vanilla wafers, beat some cream cheese with sugar and eggs, and topped the finished cheesecakes with bright cherry pie filling. The result? Tiny, beautiful cheesecakes that disappeared faster than I could serve them.

These Mini Cherry Cheesecakes are proof that good things come in small packages. You don’t need fancy equipment or a water bath, just a muffin tin, a few simple ingredients, and less than an hour. They’re perfect for parties, potlucks, or when you need a make-ahead dessert that feels homemade and special. If you love creamy desserts like my White Chocolate Raspberry Cheesecake or the cozy flavor of Caramel Apple Cheesecake Bars, these mini cheesecakes will fit right into your rotation.
The Story Behind These Mini Cherry Cheesecakes
I grew up believing that dessert should feel welcoming, not complicated. My dad could turn a few simple ingredients into something magical, and that spirit stuck with me. These mini cheesecakes remind me of his “make-do magic.” They’re the kind of dessert that brings comfort, not stress.
Each bite is a perfect balance, creamy cheesecake filling, a buttery vanilla wafer base, and a glossy cherry topping that adds just the right pop of color and sweetness. I’ve tried endless variations, blueberry, strawberry, even chocolate swirl, but cherry always wins hearts. It’s classic, cheerful, and looks like something you’d see in a bakery window.
They’re also freezer-friendly, which makes them a great make-ahead option for holidays or birthdays. I often bake a batch, keep half for myself, and tuck the rest away for unexpected guests or sweet cravings.
Print
Mini Cherry Cheesecakes: A Simple Dessert, and Perfect Every Time
- Total Time: 45 mins
- Yield: 48 mini cheesecakes
- Diet: Vegetarian
Description
- Creamy, bite-sized Mini Cherry Cheesecakes with buttery vanilla wafer crust and glossy cherry topping. Easy to make, freezer-friendly, and always a crowd favorite.
Ingredients
- 1 (12 ounce) package vanilla wafers
- 2 (8 ounce) packages cream cheese, softened
- ¾ cup white sugar
- 2 large eggs
- 1 teaspoon vanilla extract
- 1 (21 ounce) can cherry pie filling
Instructions
- Preheat oven to 350°F (175°C). Line two 24-cup miniature muffin tins with paper liners.
- Crush vanilla wafers into fine crumbs. Press about ½ teaspoon crumbs into each liner.
- In a large bowl, beat cream cheese, sugar, eggs, and vanilla until light and fluffy.
- Spoon mixture into muffin cups, filling almost to the top.
- Bake for 15 minutes, or until centers are set. Cool completely in pan.
- Top each with about 1 teaspoon of cherry pie filling.
- Chill before serving and enjoy!
Notes
- Store cheesecakes in an airtight container in the refrigerator for up to 5 days.
- They can also be frozen for up to 2 months, thaw overnight before serving.
- Try swapping cherry topping for blueberry or raspberry for a flavor twist.
- Prep Time: 30 mins
- Cook Time: 15 mins
- Category: Dessert
- Method: Baking
- Cuisine: American
Table of Contents
Why These Mini Cherry Cheesecakes Always Turn Out Perfect
The beauty of Mini Cherry Cheesecakes is in its simplicity. You only need six basic ingredients: vanilla wafers, cream cheese, sugar, eggs, vanilla extract, and cherry pie filling. The crushed wafers make an easy crust, and the creamy filling bakes up light and smooth. There’s no fuss, no water bath, no long chill time. Just bake, cool, and top with cherries.
If you’ve ever tried my Italian Ricotta Cheesecake or No-Bake Cheesecake, you’ll recognize the same creamy texture here. But these minis have something extra, they’re portable and shareable. Bring them to a picnic, pack them for lunch, or serve them at a dinner party. They travel well and taste even better the next day when the flavors settle in.
How to Make Mini Cherry Cheesecakes (Step-by-Step Guide)
Making Mini Cherry Cheesecakes is one of those baking projects that looks impressive but couldn’t be easier. Each step is quick, simple, and completely foolproof. Whether you’re baking for a party or just want a sweet treat after dinner, this recipe comes together in less than an hour, start to finish.
Step 1: Prepare the Base
Start by preheating your oven to 350°F (175°C) and lining two miniature muffin tins with paper liners. Each batch will make about 48 mini cheesecakes, which sounds like a lot but trust me, they go fast.
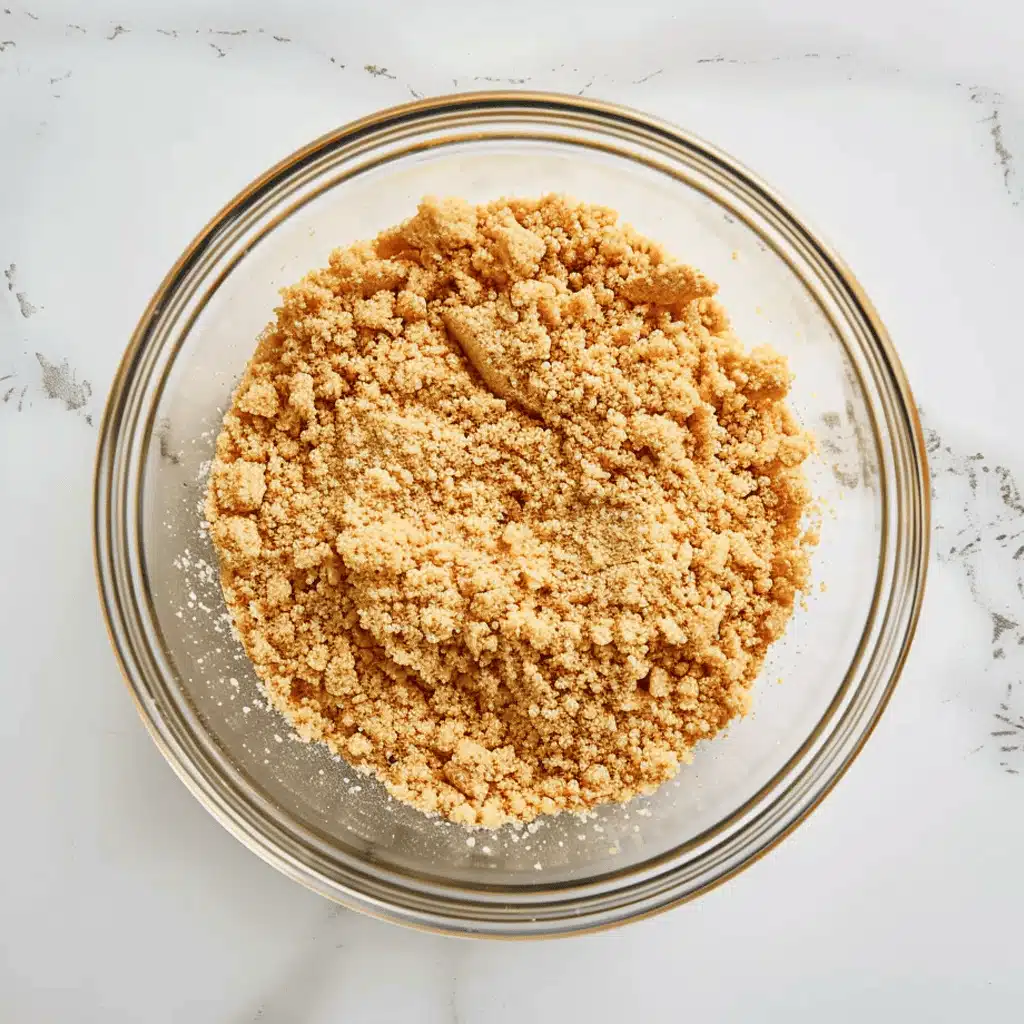
Next, crush a package of vanilla wafers until fine crumbs form. You can pulse them in a food processor or place them in a resealable bag and crush them with a rolling pin. Press about ½ teaspoon of crumbs into the bottom of each muffin liner. These crumbs will form a lightly sweet, buttery crust that balances the creamy filling beautifully.
If you love that crisp base, you might also enjoy my Mini Strawberry Pies, which use a similar technique for bite-sized fruit desserts.
Step 2: Make the Cheesecake Filling
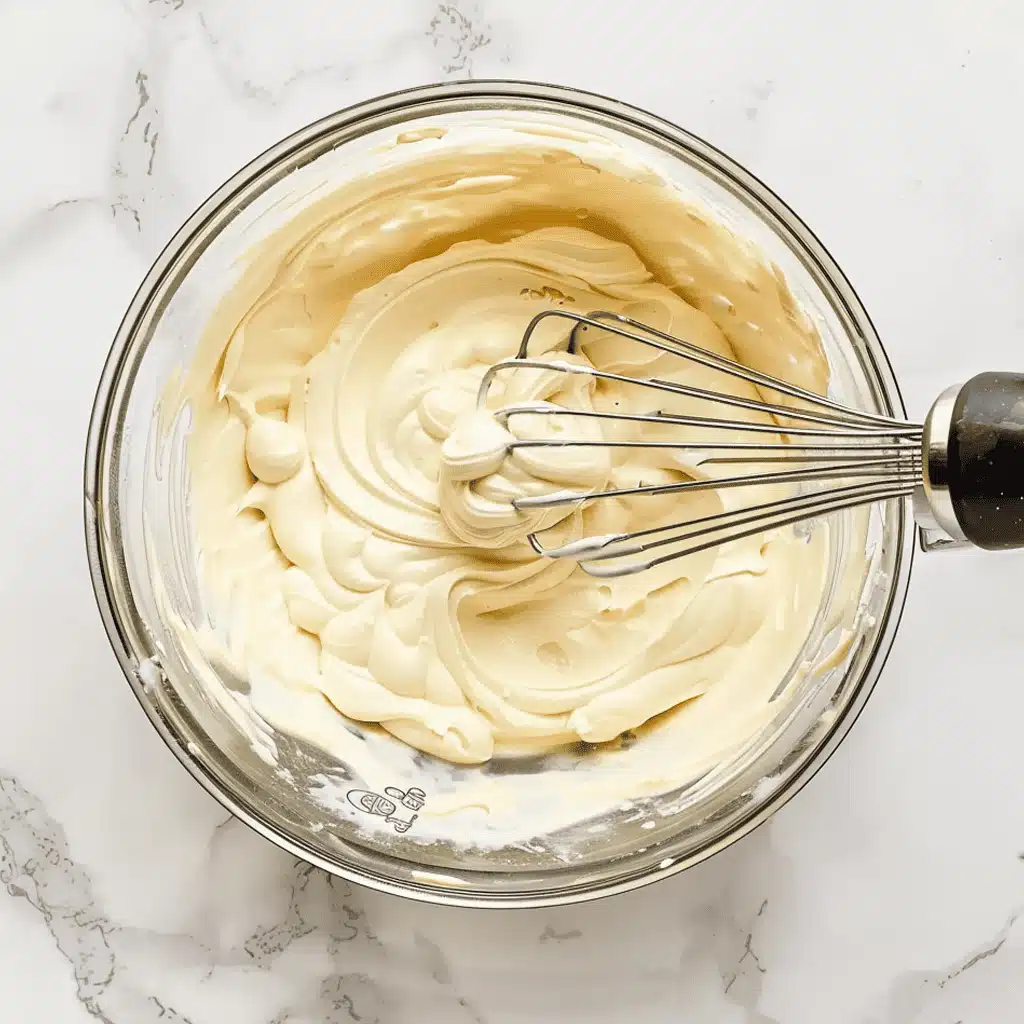
In a large mixing bowl, beat together cream cheese, sugar, eggs, and vanilla extract until the mixture is smooth and fluffy. The secret to silky cheesecakes is starting with room-temperature cream cheese, it blends easier and gives a creamy texture without lumps.
Use a hand mixer or stand mixer and beat just until combined. Overbeating can add too much air, which may cause cracks as they bake. The batter should look light but thick enough to spoon.
Step 3: Fill and Bake
Spoon the cream cheese mixture into each liner, almost to the top. They’ll rise slightly while baking, then settle as they cool. Bake for 15 minutes, or until the centers look set but still have a gentle jiggle.
Remove the pans from the oven and let them cool completely in the pan. The cooling process allows the texture to firm up without becoming dry. This step is crucial, it helps achieve that rich, creamy consistency that makes cheesecake irresistible.
If you’ve ever made my Sopapilla Cheesecake Pie, you’ll recognize that same balance of creamy filling and buttery base here, just in miniature form.
Step 4: Add the Cherry Topping
Once the cheesecakes have cooled, spoon about 1 teaspoon of cherry pie filling onto each one. You can use store-bought cherry filling for convenience or make your own if you want to customize the flavor. The cherries add a burst of color and the perfect tangy contrast to the smooth cheesecake.
If cherries aren’t your favorite, you can swap in blueberry, raspberry, or even lemon curd, just like the flavor twist in my Chocolate Raspberry Cake.
Step 5: Chill, Serve, and Enjoy
Let the cheesecakes chill in the fridge for at least one hour before serving. This helps them set beautifully and deepens the flavors. The crust becomes perfectly crisp, the filling turns velvety smooth, and the cherries glisten on top.
Serve them directly from the fridge or at room temperature for a creamier texture. Arrange them on a platter for parties or store them in an airtight container for up to five days.
If you need a dessert that’s elegant yet effortless, these Mini Cherry Cheesecakes check every box. They’re ideal for holidays, family gatherings, or a cozy night in, sweet, creamy, and made to share.
Delicious Variations & Expert Serving Tips for Mini Cherry Cheesecakes
The beauty of Mini Cherry Cheesecakes is how versatile they are. Once you’ve mastered the basic recipe, you can get creative with endless flavor variations, toppings, and presentation ideas. Whether you’re baking for a celebration or prepping freezer-friendly desserts, these little cheesecakes adapt perfectly to any occasion.
Flavor Variations Worth Trying
You don’t need to stick to cherry every time, think of this recipe as a blank canvas for your favorite flavors. Here are a few of my favorite spins that taste just as amazing:
1. Blueberry Swirl: Replace the cherry pie filling with blueberry topping and add a touch of lemon zest to the batter for brightness.
2. Chocolate Chip Cheesecake: Stir in a handful of mini chocolate chips before baking for a rich, creamy twist that pairs perfectly with the buttery crust.
3. Lemon Cream Cheesecake: Mix in a tablespoon of lemon juice and top with lemon curd for a tangy treat. If you love citrus desserts, my Lemon Cranberry Muffins are another zesty favorite that pairs beautifully with this recipe.
4. No-Bake Variation: When it’s too hot to turn on the oven, use a similar filling method from my No-Bake Cheesecake. Just skip baking and chill the filled cups until firm.
These small changes give your mini cheesecakes a whole new personality while keeping that same rich, creamy texture everyone loves.
Creative Ways to Serve Mini Cherry Cheesecakes
These mini cheesecakes aren’t just delicious, they’re beautiful, too. Here are some easy ways to make them shine at your next gathering:
Serve on a tiered dessert stand: Their size makes them perfect for layering on a stand with other bite-sized sweets like truffles or cookies.
Add whipped cream or chocolate drizzle: A swirl of whipped cream or a drizzle of melted dark chocolate instantly dresses them up for holidays and dinner parties.
Top with fresh fruit: Strawberries, raspberries, or even a few blueberries on top of the cherry filling add a pop of freshness and color.
Pair with coffee or tea: The light sweetness of these cheesecakes makes them perfect alongside an afternoon cup of coffee or a warm herbal tea.
These serving ideas make your desserts look polished and professional, even when they’re made right at home.
How to Freeze Mini Cherry Cheesecakes
Yes, you can freeze these little beauties! It’s one of the reasons I love them so much. To freeze, place cooled cheesecakes on a baking sheet and freeze uncovered until solid. Then, transfer them to an airtight container or freezer bag with parchment between layers.
They’ll stay fresh for up to two months. When ready to serve, let them thaw overnight in the refrigerator. The texture remains creamy, and the crust stays crisp. It’s a lifesaver for busy weeks or when you want to prep desserts in advance for holidays or parties.
Storage and Make-Ahead Tips
These Mini Cherry Cheesecakes will last up to five days in the fridge when stored in an airtight container. You can even make them a day or two before serving, they actually taste better as the flavors develop overnight.
If you’re serving at a party, keep them chilled until about 30 minutes before dessert time, so they’re creamy but not too firm. That’s the sweet spot for flavor and texture.
Conclusion
At their heart, Mini Cherry Cheesecakes are everything dessert should be, simple, comforting, and irresistible. The buttery vanilla wafer crust gives just the right crunch, the cream cheese filling melts in your mouth, and that glossy cherry topping ties it all together.
They’re quick to make, easy to store, and perfect for sharing. Whether you’re baking for a family dinner, a holiday, or just a weeknight treat, these little cheesecakes never disappoint.
If you want to try more irresistible cheesecake flavors, you’ll love my Italian Ricotta Cheesecake for a classic twist or the Sopapilla Cheesecake Pie for a buttery cinnamon version.
Because in my kitchen, dessert isn’t about perfection, it’s about joy, comfort, and a little something sweet to end the day.
For more easy, feel-good recipes, browse www.easyrecipesapril.com.
Fore more recipes follow me on Facebook, Pinterest and Instagram
FAQs About Mini Cherry Cheesecakes
Can you freeze mini cherry cheesecakes?
Yes, and that’s one of the reasons I love this recipe so much. Mini Cherry Cheesecakes freeze perfectly without losing their creamy texture or bright cherry flavor. Once they’ve cooled completely, place them on a baking sheet and freeze uncovered for about an hour. Then, transfer them to an airtight container or freezer bag with parchment paper between layers.
How long do mini cheesecakes last in the refrigerator?
Stored properly, mini cheesecakes last up to five days in the fridge. Keep them covered in an airtight container to preserve their smooth, creamy texture and prevent them from drying out. For the best flavor, take them out about 15 minutes before serving. This helps soften the filling slightly, giving you that melt-in-your-mouth cheesecake perfection.
Do mini cheesecakes need a water bath?
No water bath needed! That’s what makes Mini Cherry Cheesecakes such an easy win. Because they’re small and bake quickly, they cook evenly without cracking or drying out. Just bake until the centers look set and slightly jiggly, they’ll finish firming up as they cool.
Can mini cheesecakes be made ahead of time?
Absolutely. Mini Cherry Cheesecakes are the ultimate make-ahead dessert. In fact, they taste even better the next day as the flavors blend together in the fridge. You can bake them up to two days in advance, chill them overnight, and add the cherry topping right before serving for a fresh, glossy finish.